
No money No lime: Restoring Italian walls on a shoestring
John Heseltine
Where to start....
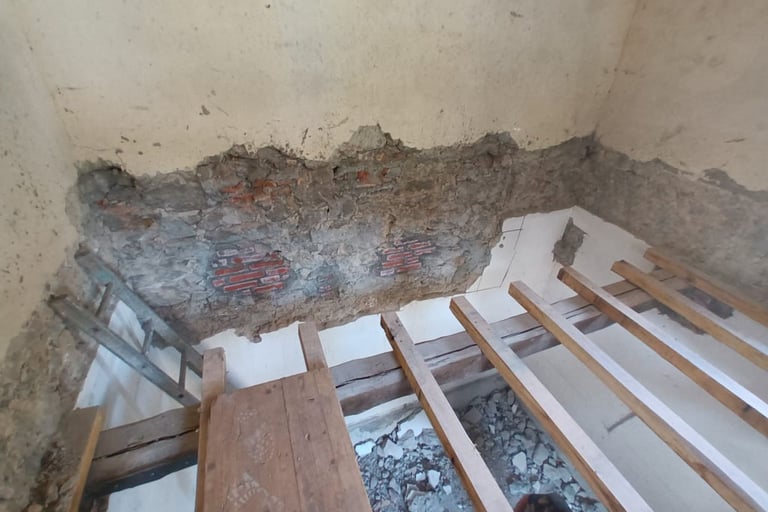
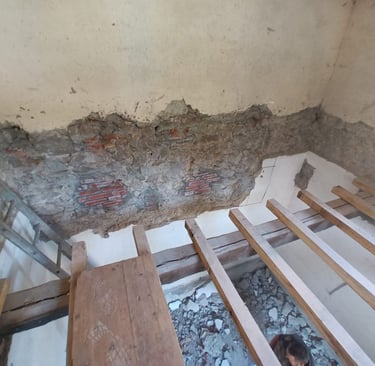
By June of 2024 the roof was finished and I was fully recovered from my accident, so it was time to tackle the next of the big problems, the condition of the walls. The heavy building work had all gone really well, the floors were in and the roof was fixed but the plaster work was a real mess.
There were areas missing because of the building work, and areas damaged by rain pouring down the inside of the walls and separating the plaster from the masonry (this is called "blown plaster"), plus all sorts of holes and cracks — so lots of problems.
In addition, this was not just a technical problem but an aesthetic and financial one as well.
In a situation like this, the usual builders aproach would be to remove all of the old plaster, put on a new flat base coat to take out all the bumps in the wall, and then a new top coat of fine plaster — resulting in flat walls and none of the lumpy finish that you get from old lime plaster.
So the situation was this:
Stripping all the old plaster off and re-plastering the walls would be very expensive in both manpower and materials and would take longer than we had available.
Plastering in lime is not a quick process (it can take up to a year to go fully hard), and time was one of the things I didn’t have, as I was up against a deadline to finish.
The bank account was empty again, as all the money had been spent doing the roof, so whatever I was going to do needed to be simple, quick, and low-cost.
If the damaged areas were re-plastered using standard methods, the result would look strange, as the new parts would be flat and the old parts would not.
I actually preferred the lumpy old-fashioned lime plaster finish to a modern dead-flat one; I just thought it looked more interesting
.
To be honest, I didn’t really have a clue what I was doing, and I was pretty much making all of this up as I went along. I had a vague idea of where I wanted to get to, but no idea how to get there.
Fortunately, I got some excellent input from a very good local plasterer who started pointing me in the right direction. He introduced me to some really useful materials made by a company called Fassa Bortolo — a company you will probably be familiar with if you’ve spent any time in a builder’s yard in Italy.
They make a wide range of pre-mixed cements, mortars, and renders — basically anything that you might need in terms of finishing, sticking, and filling building materials.
Following his advice, the materials I needed to get were:
M30
M30 is a general-use mortar used for fixing rock back into place and for general repairs. It saves you from having to source the ingredients separately — it has the right mix of sand and aggregates, lime, and cement.
KD2
KD2 is a bit more specialised. This does what the old lime-based first coat plaster would have done in the past. It’s an interesting mix of aggregates, lime, a small amount of cement, and what looks like long-chain polymers (this is a guess on my part). This gives it a gloopy, cake-mix sort of texture, so it’s sticky in a way that normal cement-based mixes are not.
The other great thing is that it can be worked into shape, and you can build up thick layers very quickly. It is primarily a lime-based mix but with enough cement for it to go hard slowly, which — as I will show — is incredibly useful.

You can probably now see where the texture and shape of the wall come from. I think the walls were plastered by throwing a thin mix of lime at the wall, building it up in layers, then smoothing it off with a stiff brush — which is where the undulations in the surface come from.
I think that once enough base coat was on the wall to flatten it out just enough, it was finished with a top coat of stronger plaster, mixed with sand and applied with a brush. I know this part is correct because I can still see the brush marks from where the top coat was applied.
Things get going
The underlying wall is far from flat — it’s all lumpy from the rocks that make it up. These days, plastering tends to be done nearly all with a flat trowel, and that’s because we’ve got very good at making things flat.
Plasterboard and render spraying mean you can now pretty much finish anything flat if you have the equipment.
But it hasn’t always been like this. You can’t stick material to a lumpy wall using a flat plastering trowel. Where the rocks stick out, the plaster will be very thin; where there are gaps between the rocks, it will leave a thick layer of plaster that will fall out because it’s too heavy. So how did they put the base coat on?
Below is a training video on how to apply lime render to an uneven wall — you don’t plaster it, you throw it (from 2:45).
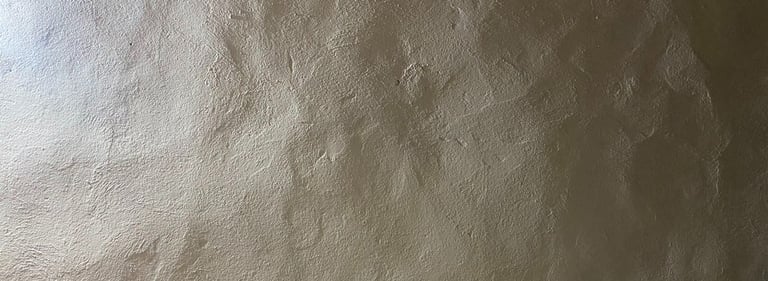
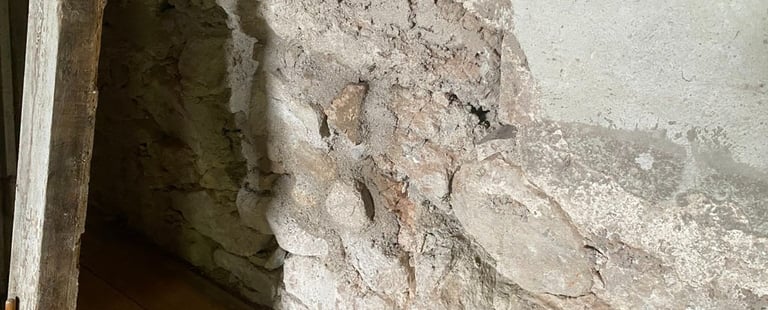
So look at this section of random wall from the house,
The surface is rough and uneven and covered in undulations, this was clearly not done with a flat trowel. Now look at the underlying wall.
To start with.....
I went over the walls, fixing anything loose and filling any voids with smaller rocks fixed into place with the M30.
A room, generally speaking, would take about five days of preparation: knocking off any loose plaster, making sure whatever was left on the wall was solid, and raking out any cracks.
Then, working with my friendly plasterer, he used the same process as outlined above. He first sealed the uncovered areas with a thin mix of KD2 by throwing it at the wall — not flat, but certainly a more even surface than bare rock.
When a sufficient amount had built up, further KD2 could be applied quite roughly with a short trowel. At this stage, you don’t need to be too careful, as this is not creating the final surface — that comes later.
Next comes the clever bit. KD2 hardens over a long period of time. You need to leave it until it’s just soft enough to work with but hard enough not to come off the wall, and then you use one of these:
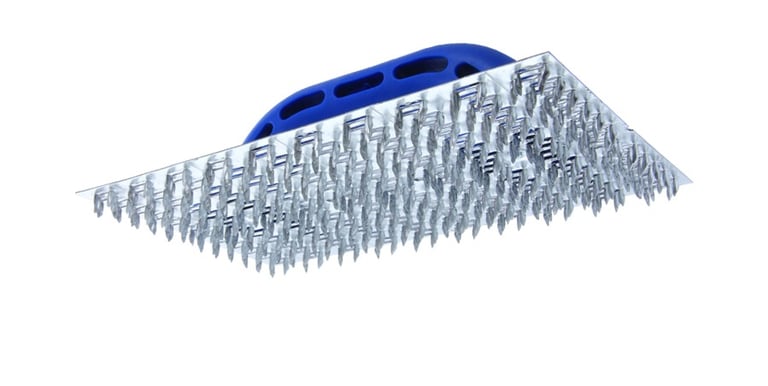
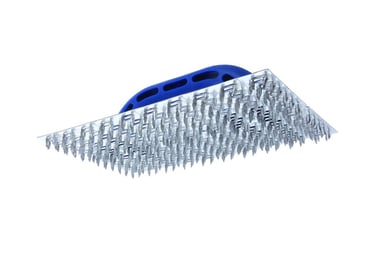
This is a Raschiatore intonaco (I’m not sure, but I think builders in the UK call this a “devil’s trowel,” which sounds a lot more sinister) — a sort of rasp. It’s designed not to put material on a wall but to take it off. It’s covered in hundreds of sharp spikes, and when you rub the surface of the KD2, it takes material off like a big Parmigiano grater.
He showed me how to use this tool, and working late into the night, I would flatten or shape the surface as it became hard enough to work with.
Leave it too long, and you’re in for a really hard day’s slog doing what you could have done in 15 minutes if you had timed it right (I speak from experience — you only make this mistake once).
So this is how your room looks when you’ve finished the base coat of KD2.


Finishing
At the end of this process, all the base coat had been applied and shaped by hand, and no more rock was showing — but it was nowhere near finished.
I had to work out a way of getting the KD2 to match the texture of the old parts of the wall. The first thing I tried was painting a patch of it to see what it would look like. I might as well not have bothered.
KD2, when dry, is like a super sponge — if you try to apply paint to it, it’s just sucked into the surface. I tried plaster, but it sucked every last drop of water out of it and then fell off. I tried a sealant, but it made no difference at all.
Even where a little paint had managed to stick, it was obvious that the KD2 had a completely different texture to the rest of the wall.
So I went back to the old walls and had a good look at them. They had a very distinctive finish that had clearly been applied with a brush, so I decided to try something similar.
The other material that plasterers use in this part of Italy is another Fassa Bortolo mix called A64.
A64 is a traditional lime-based gritty finish that you’ll see on walls all over this part of Italy. I’m not sure why it contains grit — and no one has been able to explain it to me — but I like it, and it’s very nice to use. It also contains shredded glass fibres that give it flexibility and strength. It goes on smoothly, sticks well, and can be worked using a normal trowel, sponge, or soft float.
So I soaked a section of the wall with water until it couldn’t take any more, then mixed a bucket of A64 with a lot of water until it was like batter, and then painted it on the KD2 and let it dry.
This worked — it still didn’t have the same texture, but it was getting closer and at least going in the right direction.
Once the wall was dry and sealed, I mixed up another bucket of A64, this time thicker — halfway between plaster and paint — and then, using a very stiff brush, a small trowel, and a sponge working it into the surfaces, blending the old and the new. I sprayed on water to keep it wet where needed and used a mix of brushes to get the finish I wanted — more art than plastering.
After quite a bit of practice, I got it right — or as right as it was going to get — and then continued around the house to finish all the bare KD2.
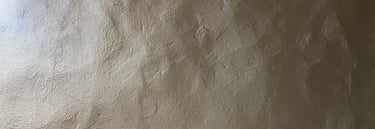
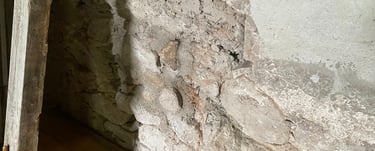
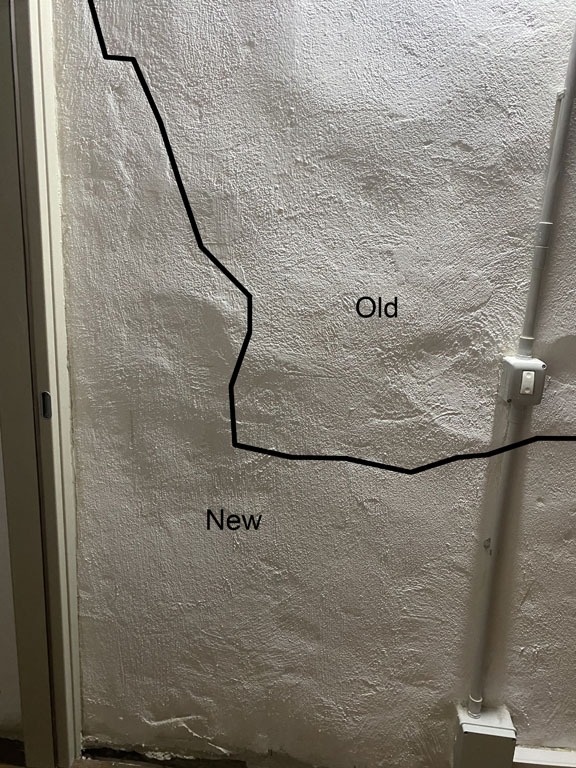
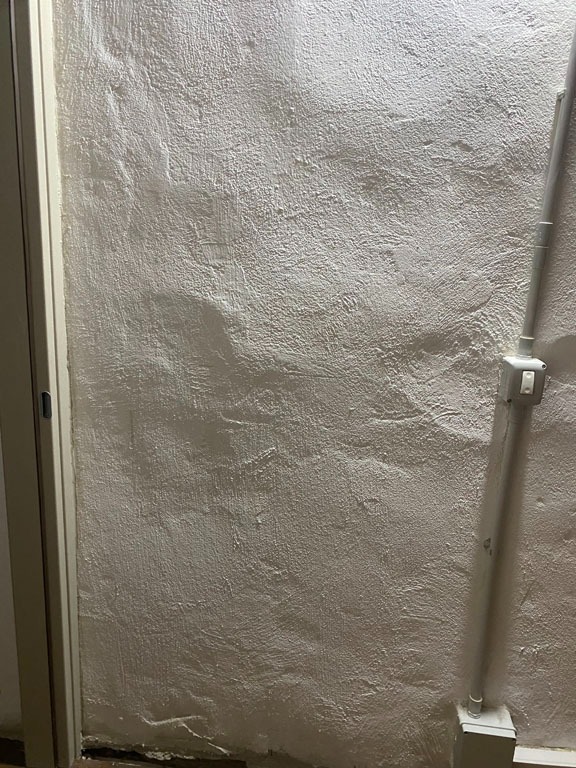
You can judge for yourself: the two images below are the same, but on one I’ve drawn a line between where my new plastering ends and the old wall begins.
Not perfect, but pretty damn good. I truly doubt that anyone looking at the walls of the house would spot the difference unless it was pointed out.

And this is how the finished walls look. The paint is a bit patchy because Italian paint is made with a lot of lime, so it takes time to react with the air before it goes white. The first time I used it, I thought I had been sold a dodgy tub of paint, as it goes on like watered-down milk. But overall, I’m pretty pleased with the result.
I managed to save a lot of the old plasterwork. It cost me a fraction of what it would have cost to re-plaster the whole house, and I think it looks pretty damn good.
Job done.