Building the new house
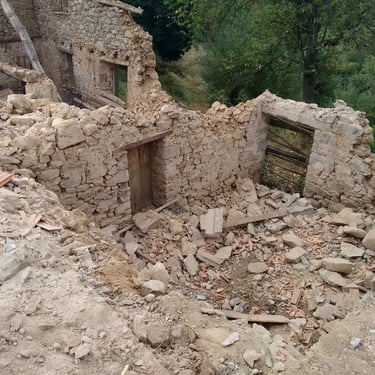
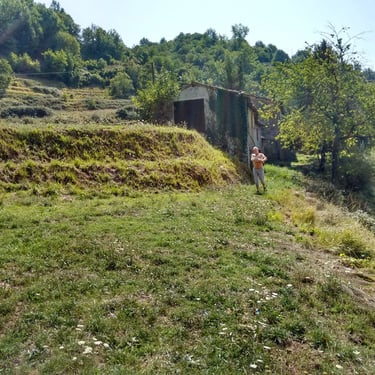
It’s a terrible thing to demolish an ancient building, but we had no choice. Because of a landslide in front of the barn many years ago, the ground was considered to be unsuitable for any kind of construction, including restoration of the existing barn.
The structure had also been quite badly damaged by earth movement behind the barn, unrelated to the landslide, and it was starting to lean over at a very precarious angle.
After the purchase, we had drawn up a plan for the renovation of the building. This was no longer going to happen, but that didn't mean the end of the story.
Under the Italian system, if you demolish a building, you can build a new one of the same size to replace it. So we simply took the design for our renovation and made plans to build a new house instead. We had to have a detailed geological survey done to find the most suitable area for the new building, and the survey identified a spot a little farther away from the main house, which would be perfect.
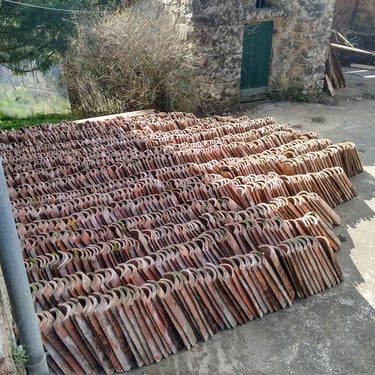
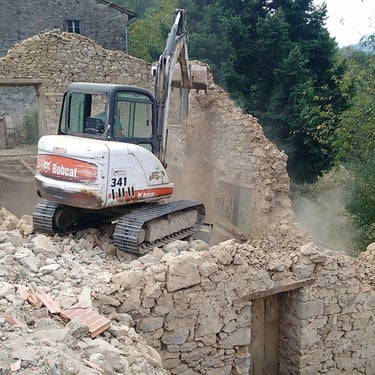
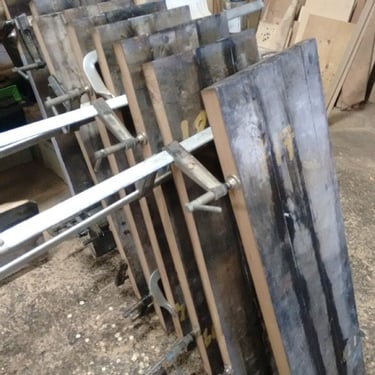
Before we could start building, we were required to demolish the old barn. I stripped out everything that we could recycle into the new house. All of the roof tiles, beams, floorboards, stone lintels, and door frames came out for reuse.
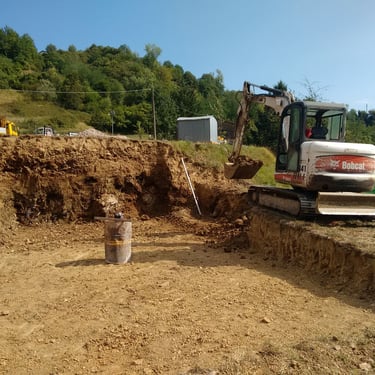
Once we had salvaged as much as could safely be taken out, an excavator moved in and within a couple of hours the barn was gone. When the excavator was finished I went back in and used a winch to pull out all the roof and floor beams that I hadn’t been able to safely remove while the building was still standing. By the time I had finished the only thing left was the rubble.
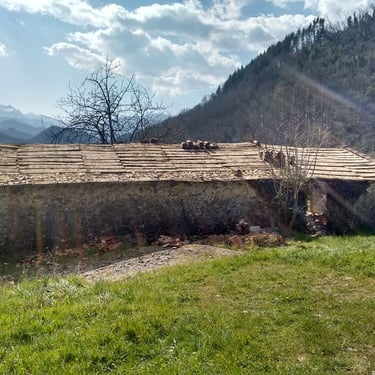

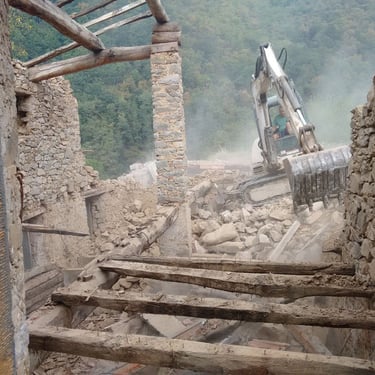
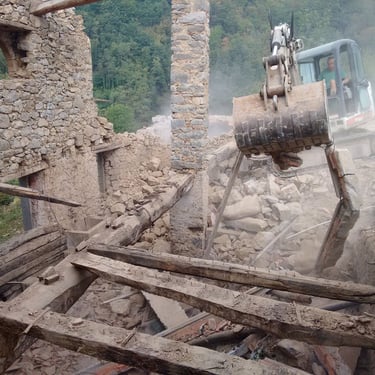
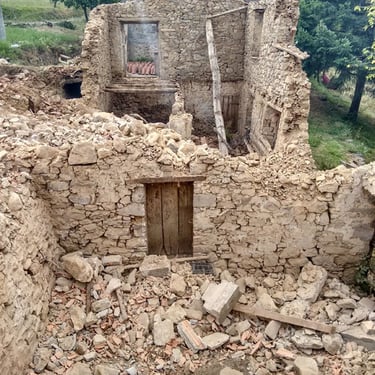
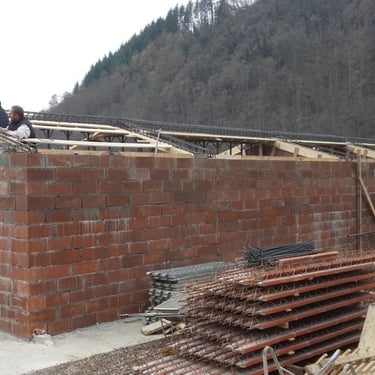
The barn has to go
Our builders, who came from a village a little farther down the valley, were very organised and thorough. Everything was done neatly and proficiently. They were an impressive crew.
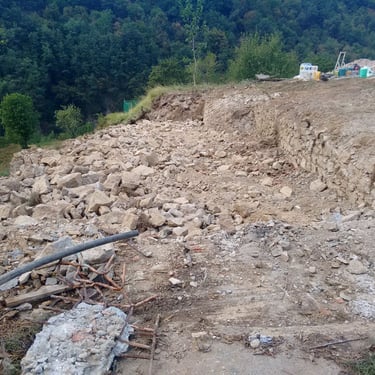
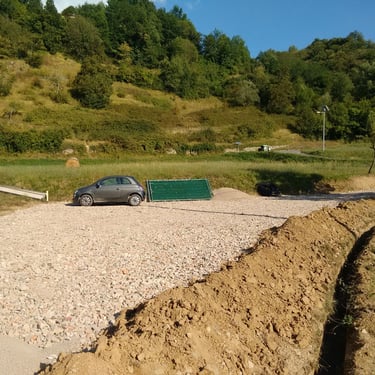
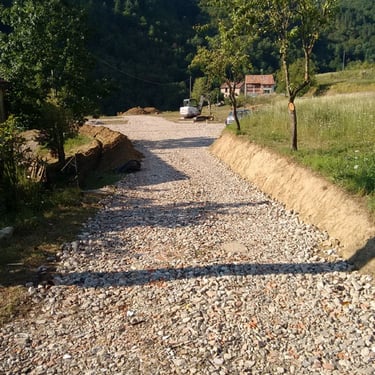
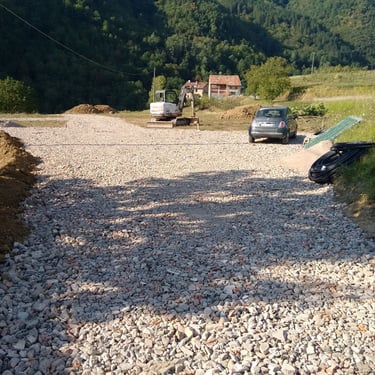
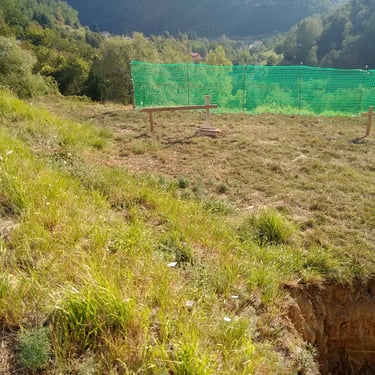
The first thing that happened was the arrival of twelve massive trucks full of coarse crushed stone, called hardcore.
The hardcore was spread all over the construction site and in every area where heavy machinery might need to be. It ensured that vehicles and equipment wouldn’t get bogged down in mud if it rained. Work would continue no matter what the weather gods threw at us.
Channels were dug for extra electric cables, water pipes were laid, huts appeared out of nowhere, and a fence was put up all the way around the work area. It all happened very quickly and efficiently.
Site preparation
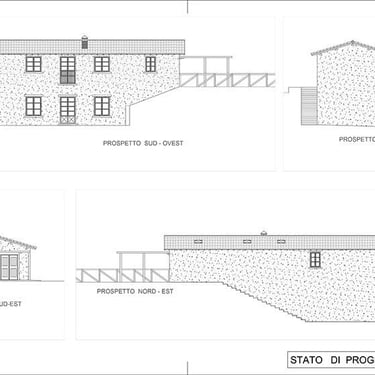
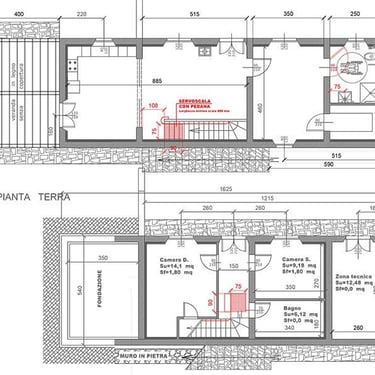
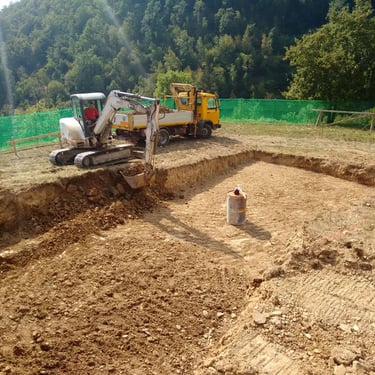
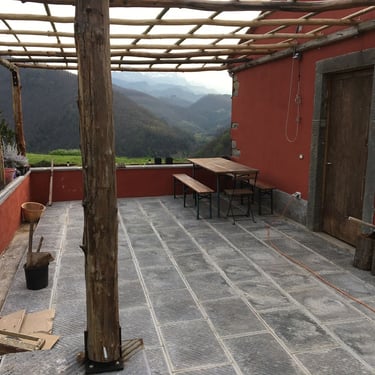
Once everything was in place the real construction work could begin. The site we had selected for the new house was a partly flat terrace with a steep-sided bank behind it. Our original design for the renovation had the house right up against the bank, with all the shared living areas, a pergola, and the main entrance on the upper floor. The new site would allow us to implement the exact same design.
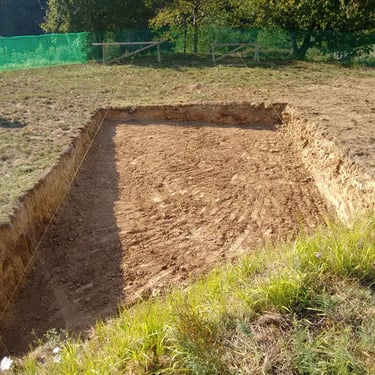
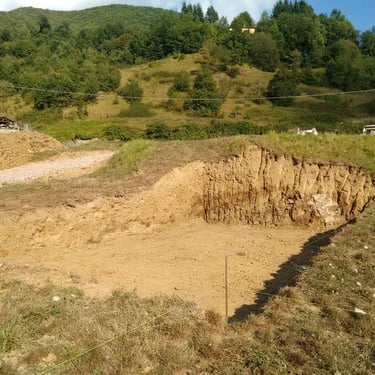
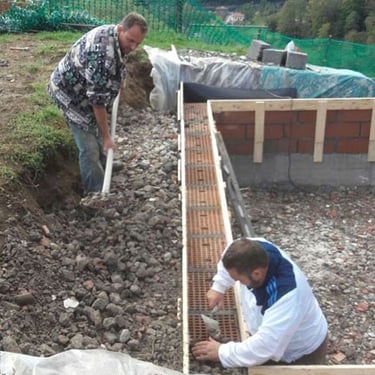
The first step was to dig a trench for the house’s massive reinforced-concrete foundations, which would follow the line of the walls. The trench was dug with precision, using careful measurements and a very big excavator.
The excavator also dug a shallower, wider trench all the way around the footprint of the house. This would be filled with concrete to create a footpath.
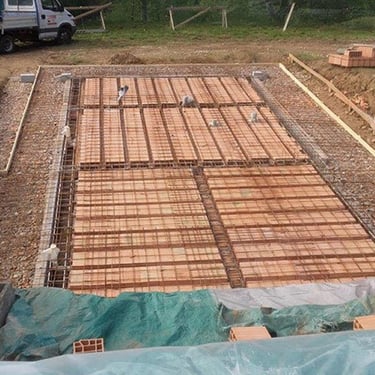
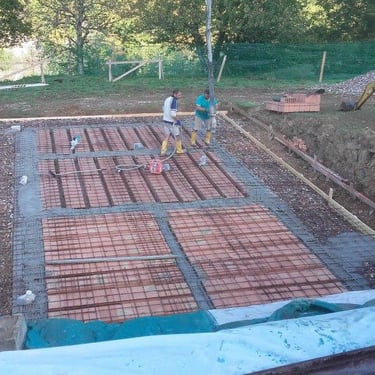
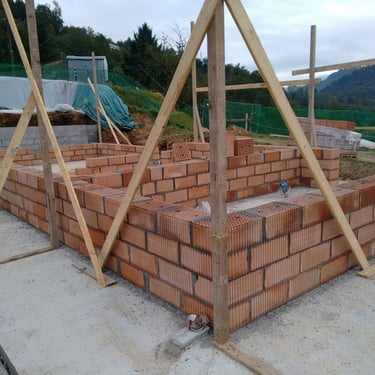
Ground works
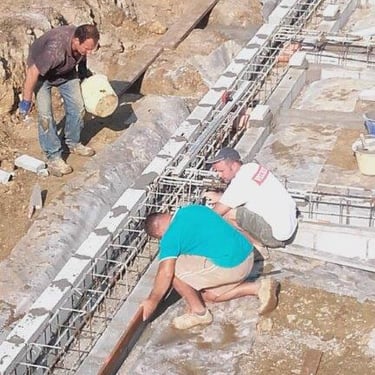
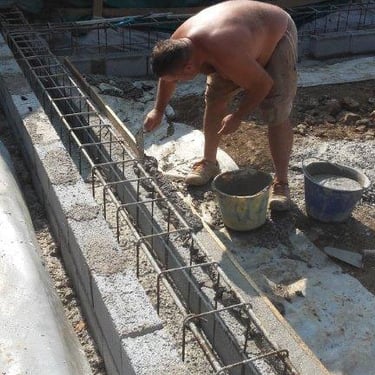
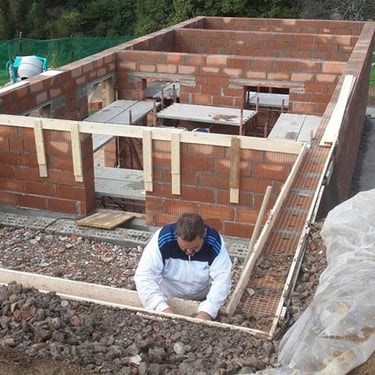
Once the ground work was completed, some temporary wooden framing, known as formwork, was put into place to serve as a mold for the foundations.
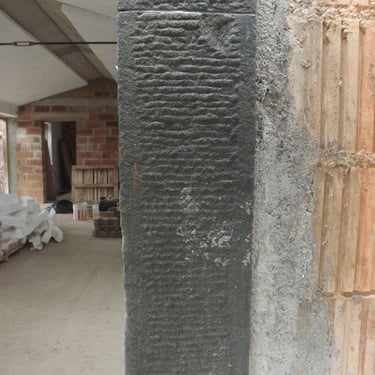
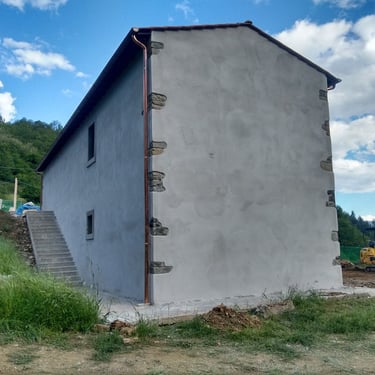
The whole of Italy is designated as an earthquake zone and there have been some quite severe earthquakes in this area. So new buildings are designed to withstand pretty much anything. Earthquake-proofing for the new house included adding three massive reinforced-concrete bands around the perimeters of the foundation, the middle of the house, and the roof.
The concrete reinforcements were supported on very strong, extruded engineering bricks, which are also good for insulation.
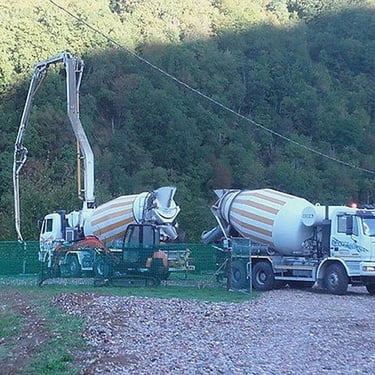
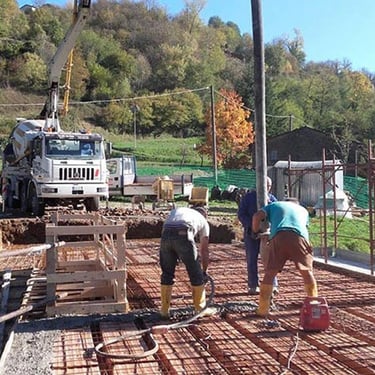
Once the formwork was done and all the reinforcing steel was in place, a parade of cement mixers arrived, one after another, delivering the concrete that created the foundations.

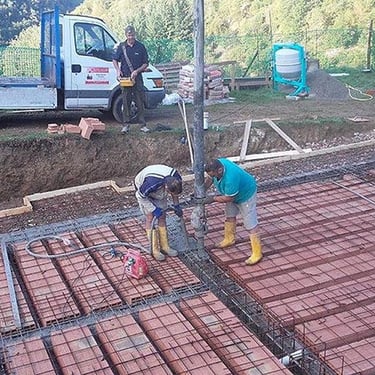
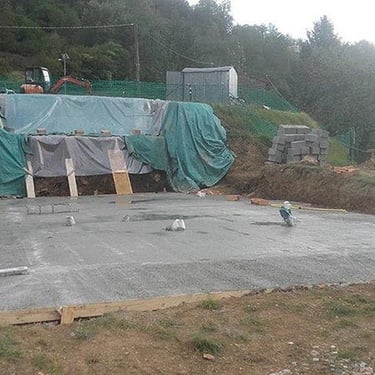
Foundations
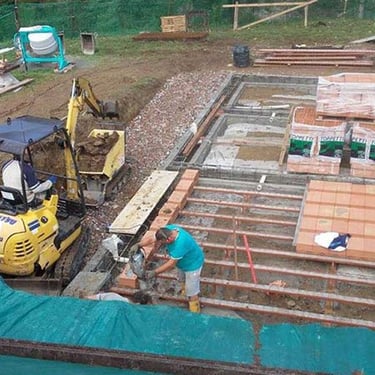
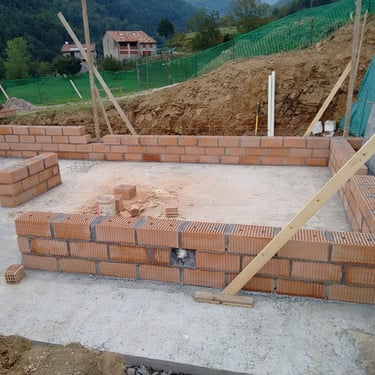
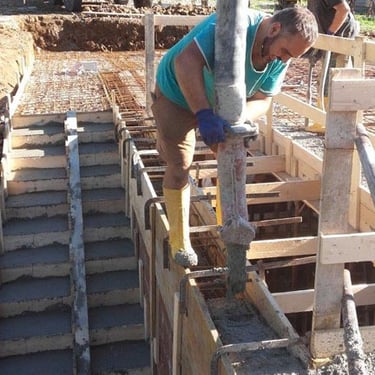
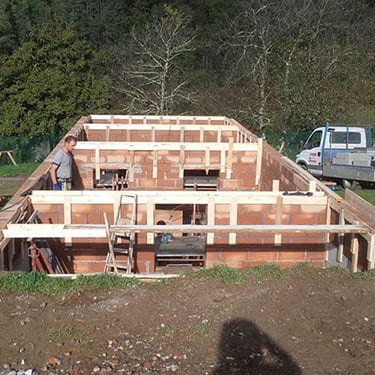
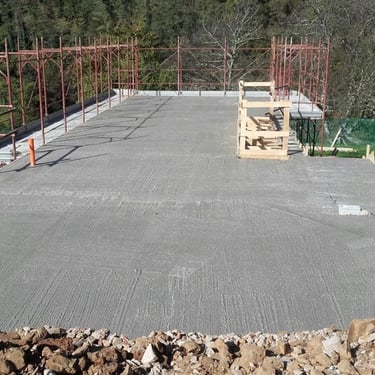
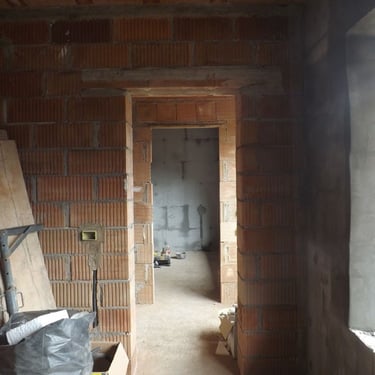
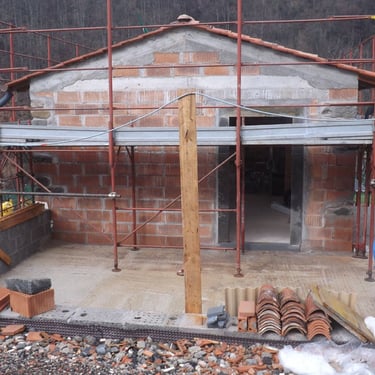
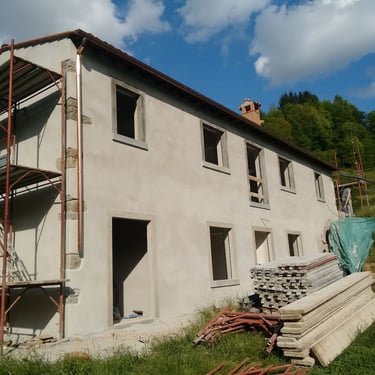
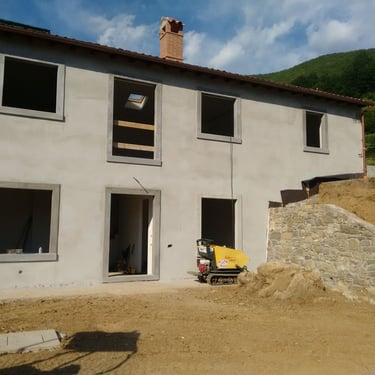
When concrete is poured, although it hardens in a day or so, it doesn’t reach full hardness for three or four weeks, so we had to wait. However, once the foundations had properly hardened, construction began and the walls flew up. Our building blocks are huge, and whole walls appeared in hours. Progress was very rapid.
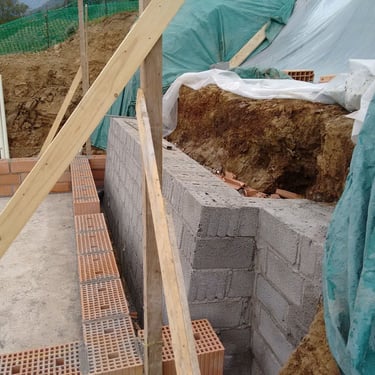
With the ground floor walls completed, more formwork was built around the top of the walls and huge steel bars were put into place. Then more concrete was poured to create the floor for the main living area.

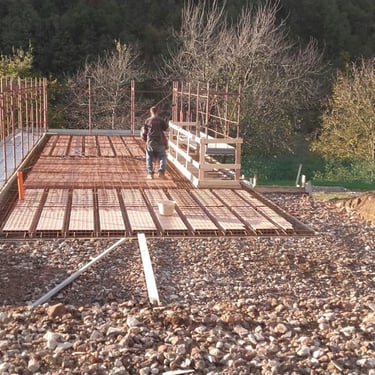
Ground floor
Again, after the pour there was a wait while the concrete fully hardened. Then just as with the ground floor, the wall construction began and, once again, the walls flew up.
People here in the Garfagnana work very hard; the builders arrived early in the morning and left late at night and there wasn’t much of a break at midday. It didn’t seem to matter to these guys what the weather threw at them, there was a constant stream of banter and quite a lot of singing, and the mood always seemed to be good.
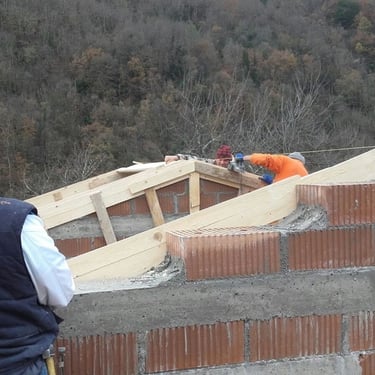
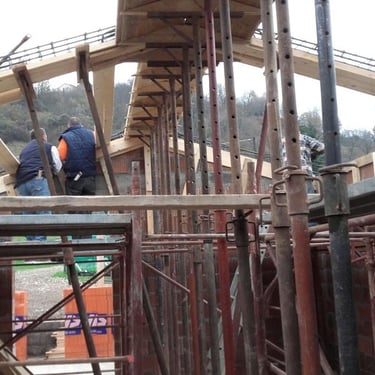
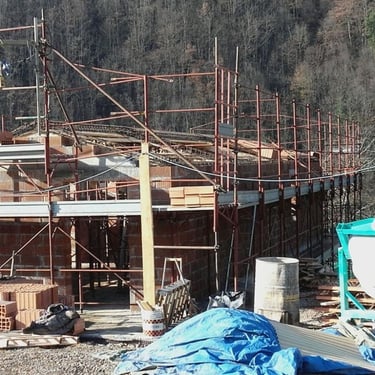
On the upper level the formwork took a different shape because we had a pitched roof.
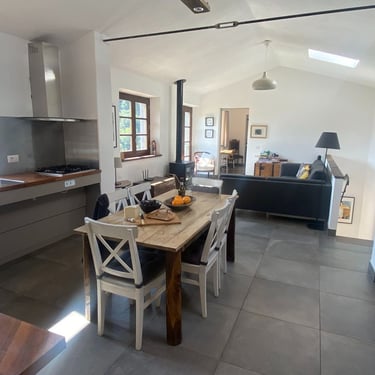
The house was designed to be economical, fast, and strong in its construction. The kitchen and main living area are open plan. Normally a supporting wall would have been put in to provide the necessary strength to hold up the roof.
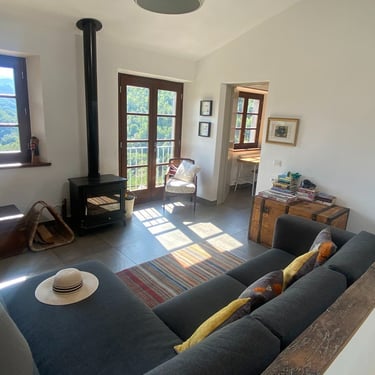
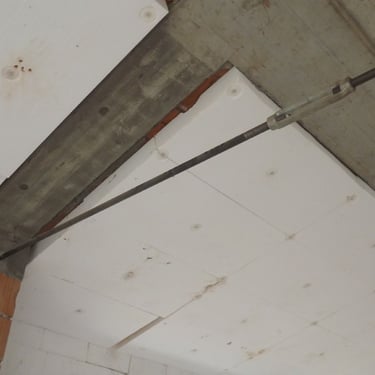
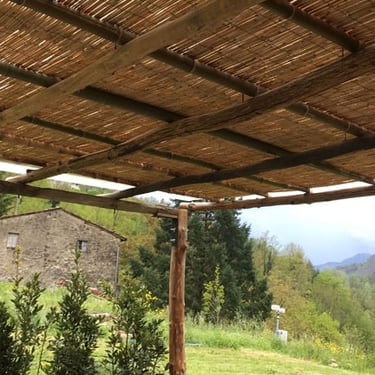
But because we wanted a large open space upstairs, we opted for a different approach. We added a tension bar at ceiling level, halfway down the length of the room, that connects the two sides of the reinforced-concrete perimeter. It essentially pulls the sides of the house together and creates a strong and stable support for the roof.
You can see this more clearly in the pictures of the finished house at the bottom of this page.
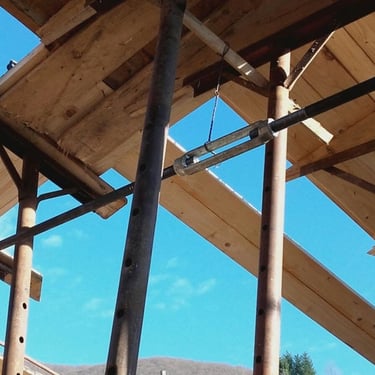
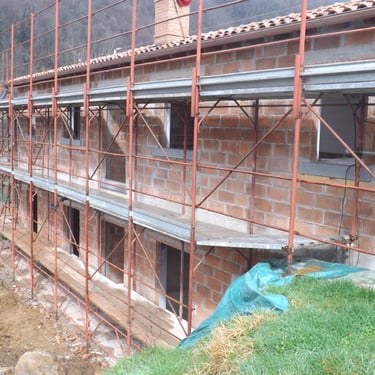
The roof used the same basic building technique as the floors, but with the additional challenge of being at an angle.
We used a forest of props, or puntello telescopico in Italian, and lots and lots of wooden planks to hold everything up during construction. (Take a look at photo #6 and you’ll see what I mean by a “forest” of props.)
Terracotta bricks were lined up with a gap between them that held a wire cage. This gap was filled with concrete that then encased the wire cage to create rigid beams. Additional wooden formworks were put in to create spaces for the skylights.
The supporting puntello telescopico and planks needed to be extremely strong, not only to support the weight of all the bricks and steel, but also the weight of the concrete, which was poured over once everything else was in place.
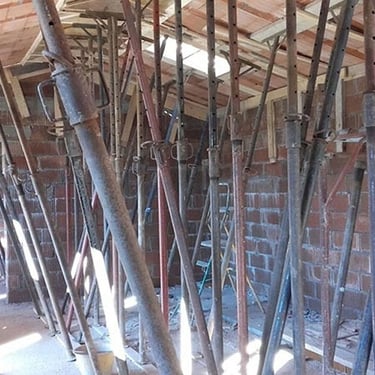
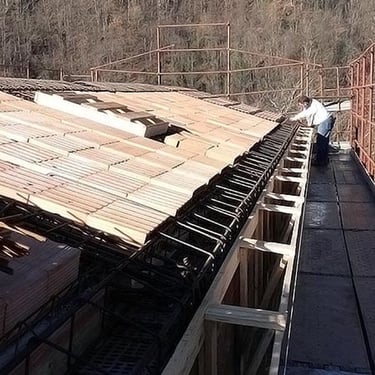
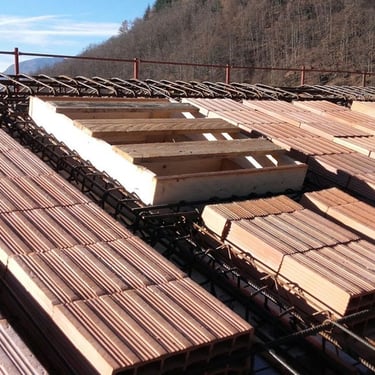
First floor and roof
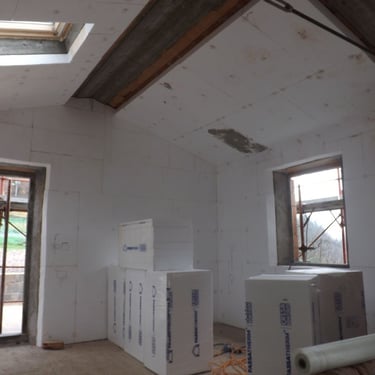
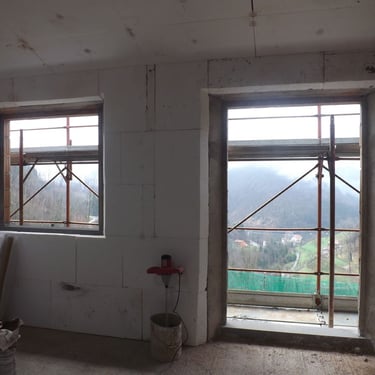
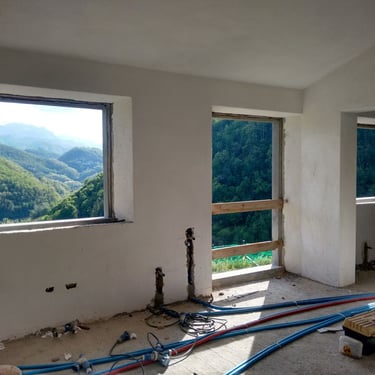
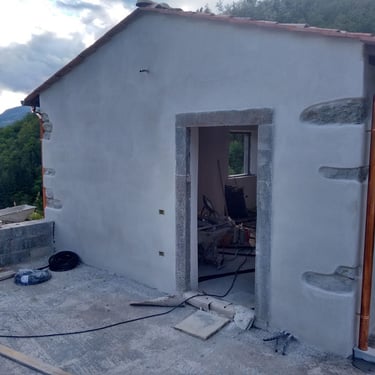
Once the roof was on, the fit-out of the inside could begin. The first thing that went in was a thick layer of insulation. This was fixed tightly to the walls using adhesive cement and stainless steel pins.
It’s very important to ensure that insulation panels fit together as tightly as possible, to prevent cold bridges (channels for cold, damp air between the outside and the inside of the house). Cold bridges can attract condensation, and moisture creates a perfect environment for mould.
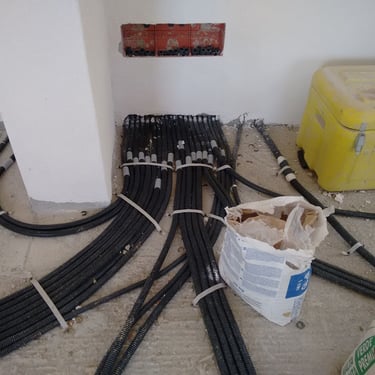
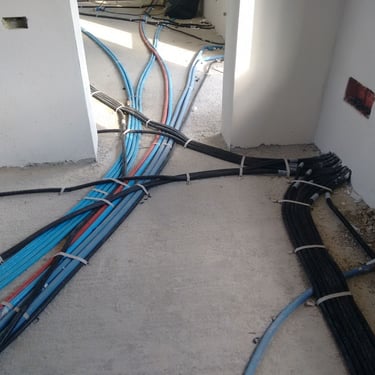
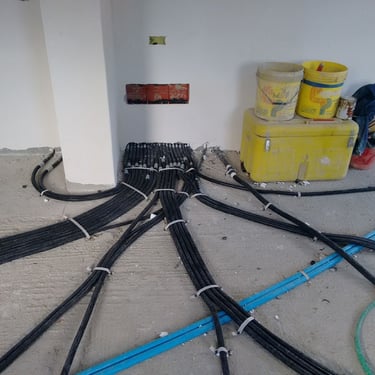
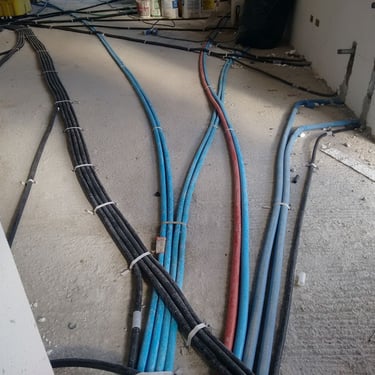
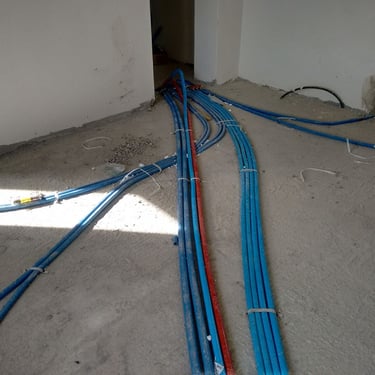
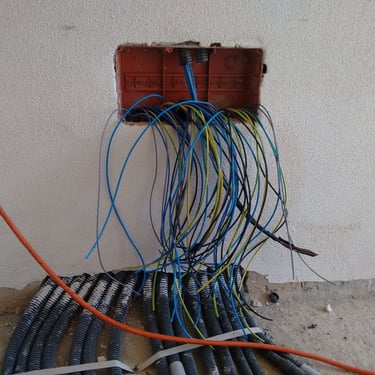
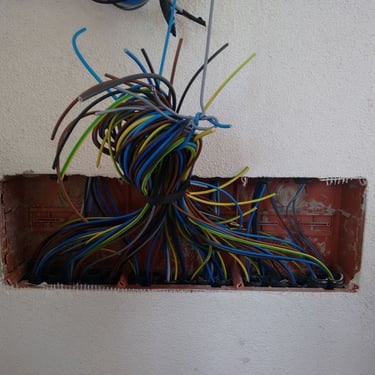
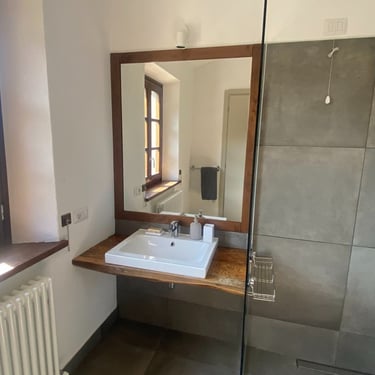
Once the insulation was in place, we could cut slots for the electrical trunking and distribution boxes, and for the central heating pipework. And we could make a start on the kitchen and bathrooms.
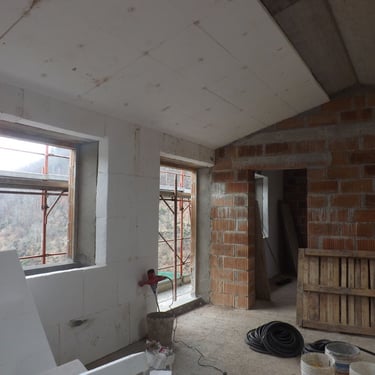
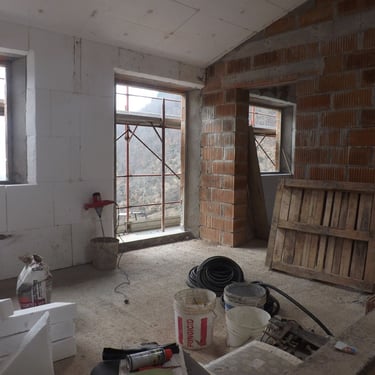
Insulation & services
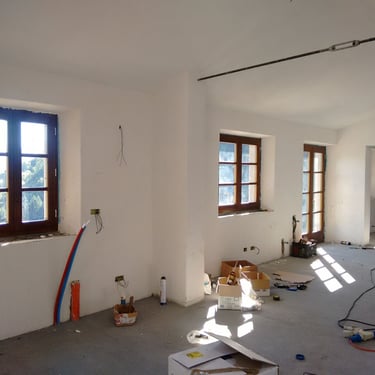
The insulation was finished with a layer of cement adhesive, and then we lined the walls with fibreglass mesh. Fiberglass mesh is extremely strong, and it’s a fast and efficient alternative to adding a layer of plasterboard on top of the insulation. Plaster is then applied directly onto the mesh.
We used a traditional lime plaster throughout the house.
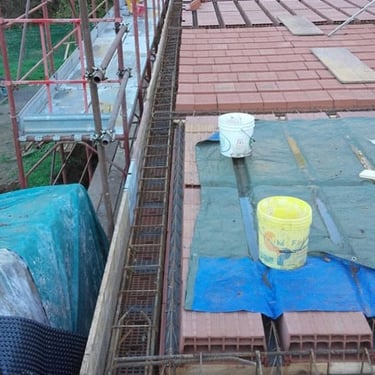
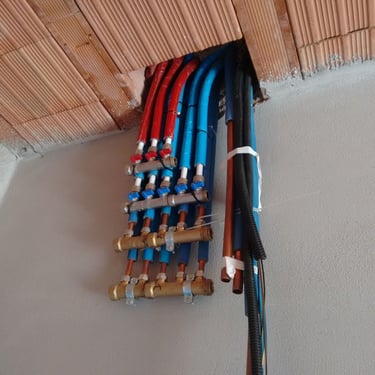
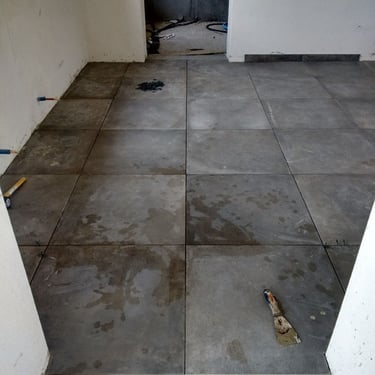
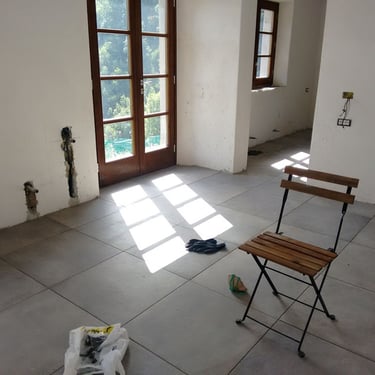
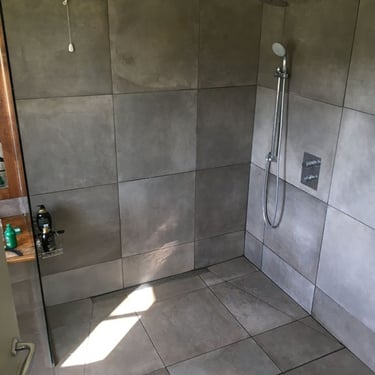
All of the pipework for the bathrooms, kitchen, and central heating run “through” the floors. They were laid on top of the ground floor ceiling, covered in a layer of screed (a slightly stiff mix of sand and cement that can be levelled or shaped) and then, finally, the tiles were laid on top of the screed.
The water pipes were installed in a single run, with no breaks anywhere, and they come together into a central “manifold”. Each run can be isolated if there’s a problem and there’s no need to turn off the whole water supply.


Plastering & rendering
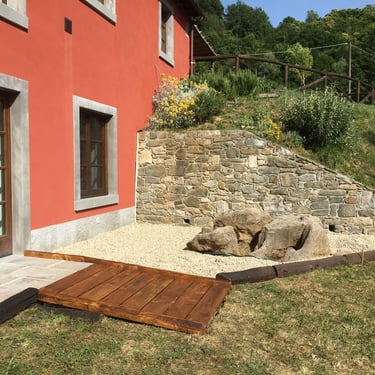
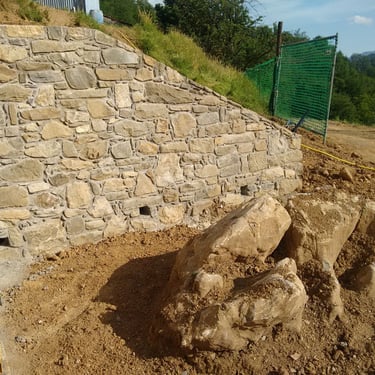
We thought the landscaping would be easy, and in general it was, but we were surprised to discover a huge rock just below the surface of the soil right where we were planning to do some levelling. It blew up the pump on the excavator.
It was pretty obvious that we were never going to be able to move it, so we turned it into a garden feature. It looks great. We feel bad about the excavator, but we’re happy to have the rock.
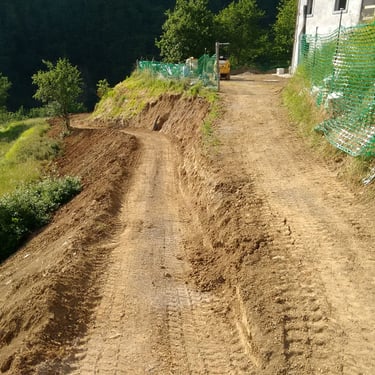
Careful landscaping was important. The final angle of the ground needed to fall away from the house so rainwater would drain away instead of pooling around the foundations. Even leaving the rock where it was, there was still a huge amount of earth to be removed.
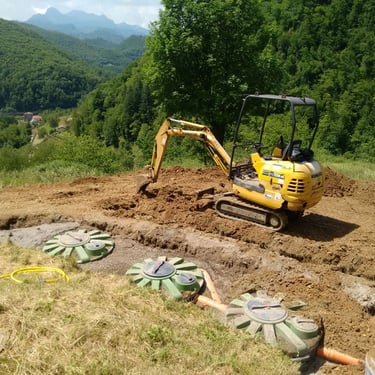
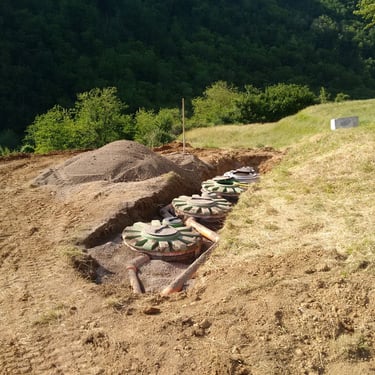
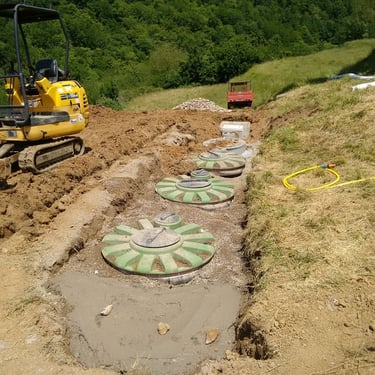
The house also needed to be connected to its new septic tank system. The system consists of four huge underground tanks, where black and grey water are treated separately. The final outflow connects to a soak-away that zig zags down the hillside.
We took advantage of having lots of extra soil left over from the landscaping and septic system work to create a footpath that would give better access to the lower terraces.
Landscaping & septic tank
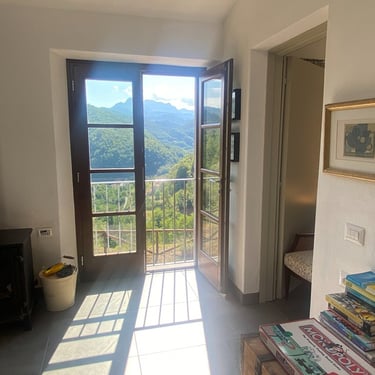
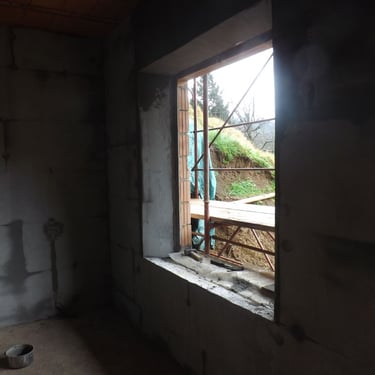
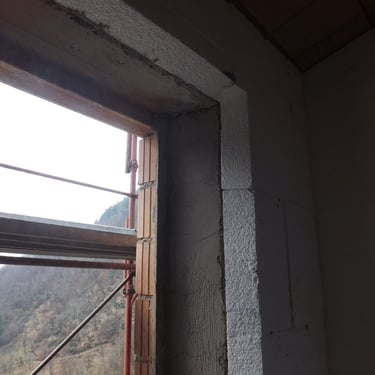
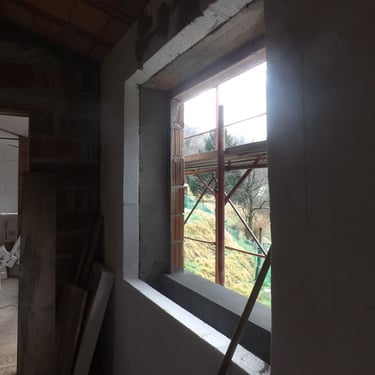
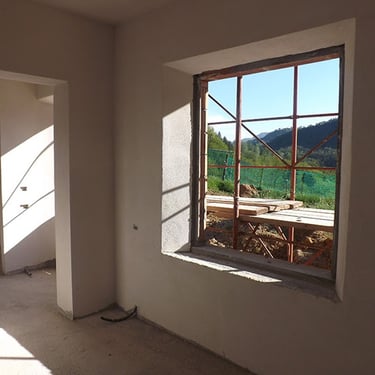
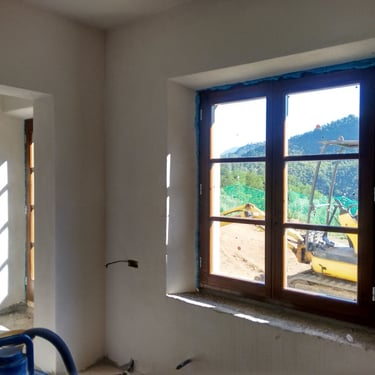
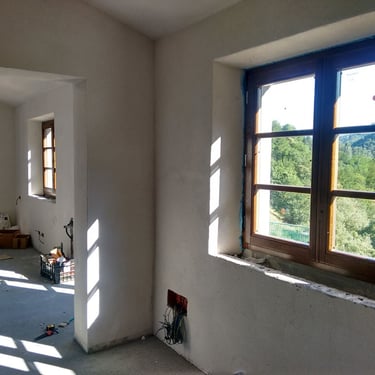
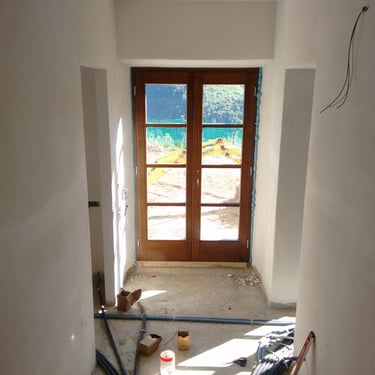
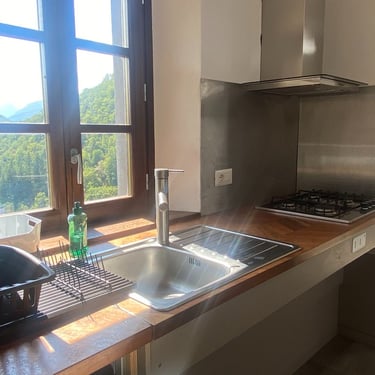
Our windows were made locally. They have handmade frames of solid chestnut with 40mm argon-filled double glazing, and they’re fully sealed all the way around. Multi-point locking prevents them from distorting in the sunshine and heat and keeps the house draft free.
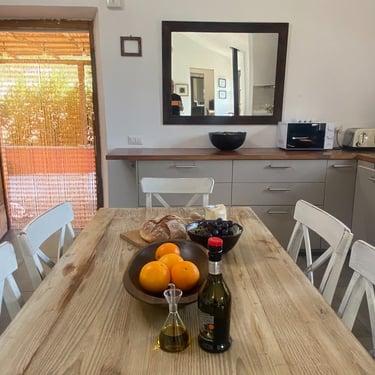
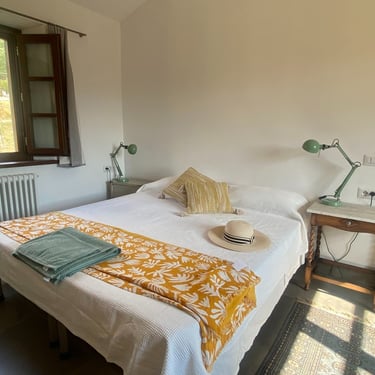
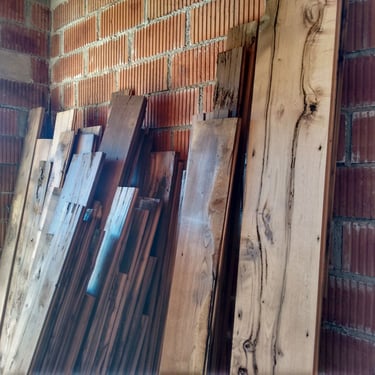
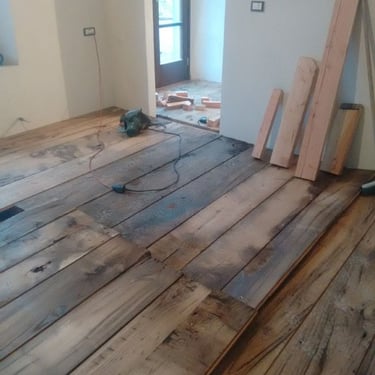
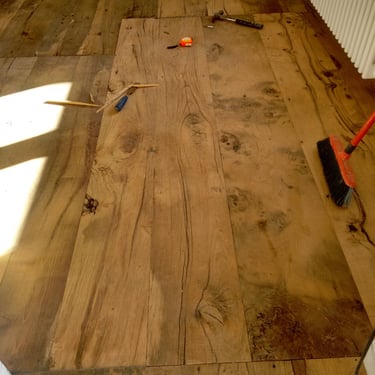
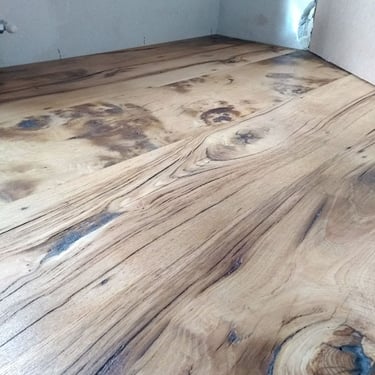
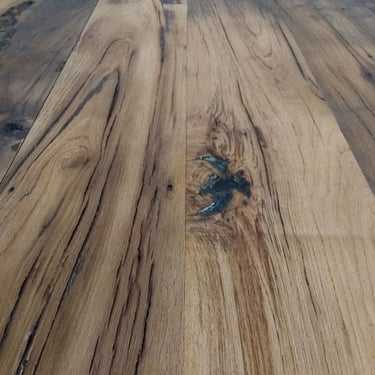
We had salvaged the floorboards from the barn when we demolished it, and our local carpenter agreed to put them through his planer for us. (A planer is a machine used for shaving off layers of wood to reduce thickness or to remove rough or damaged areas.) We needed all the planks to be the exact same thickness, and we also needed to plane them down to undamaged wood.
The planks were full of old nails and other bits of metal, all of which needed to be removed before planing because they would damage the planer’s blades. So I spent the next three weeks painstakingly checking every square inch of the wood with a metal detector and extracting nails, pins, and buckshot. In the end, I wound up with several buckets of scrap metal. That barn floor had had a long, hard life.
By the time the planing and tidying-up were completed, we only had about a quarter of the amount of wood we’d started with, but it looked fantastic and there was just enough to do the ground floor.
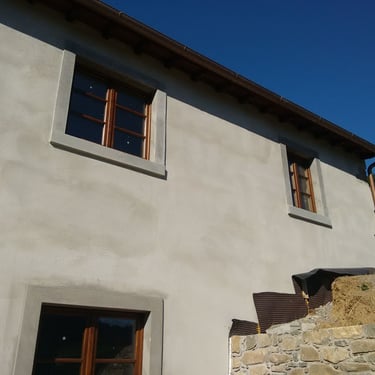

Windows & floors
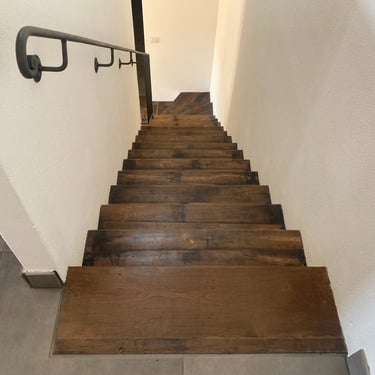
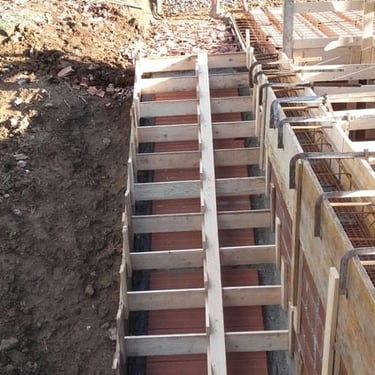
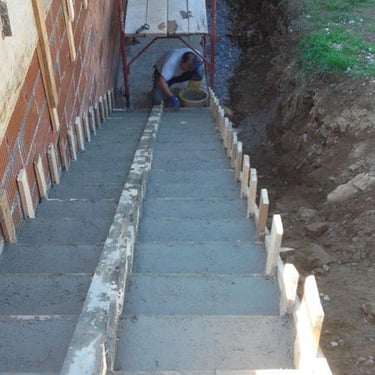
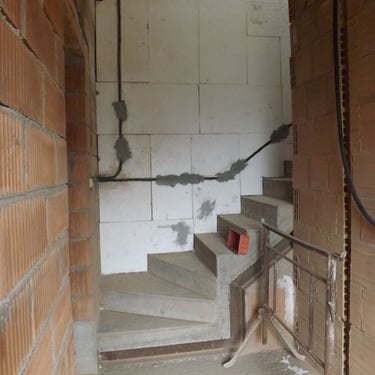
We were now down to the final details. Our carpenter had given us some old, flat, barrel planks, and he let me use some of his equipment to finish them off and turn them into steps.
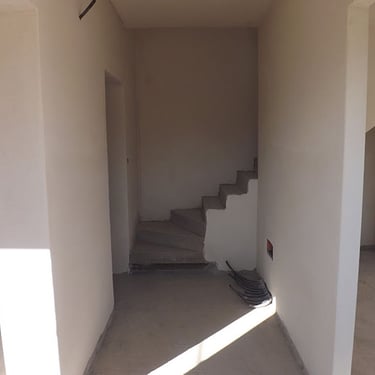
The floor boards were laid and all that was left was to fit out the kitchen and the upstairs bathroom.
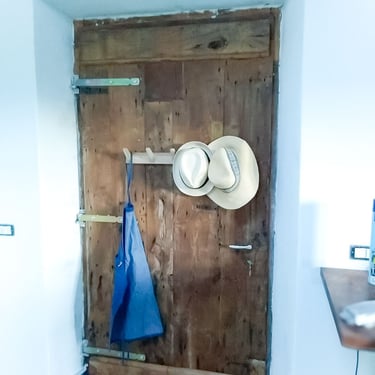
When I demolished the barn I had rescued the two original outside doors. They were in quite a poor state: patches of rot at the bottom, holes from old locks, holes from gunshot, and lots of old square handmade nails. I wanted to reuse them but they needed a lot of tidying up.
However, this time I wanted to keep the original finish rather than planing them flat, so I took them apart and sanded each board by hand to remove all the old paint. Then I carefully chose the best parts of each plank for the most visible areas of the door and glued them all back together.
I sandwiched a square frame between the front and back layers of boards to keep the doors stable and prevent warping. Finally, I used a router to make a slot for a multipoint lock. Then I made the doorframes out of old floor joists.


Finishing off
The construction was approved and signed off by the commune in October 2019 and, at that moment, our old barn was officially transformed from a building site into a new house.
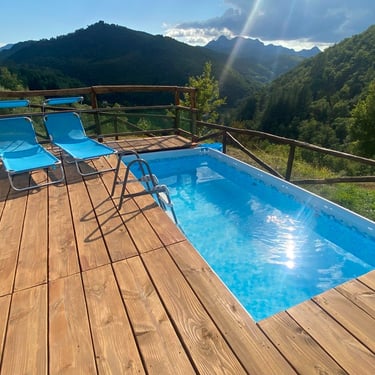
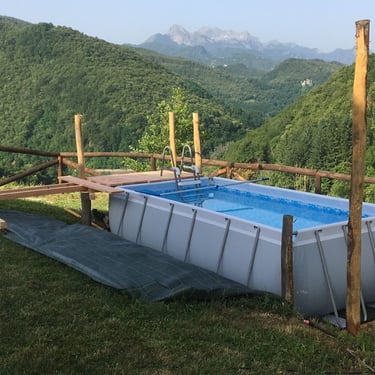
By the beginning of 2020, the only thing we still had to do was add a swimming pool. Then we would be ready to start advertising the property and welcoming vacationers.
There was just one little problem: people in China had started coming down with an illness that was alarming the experts. Covid-19 had arrived.
By March of 2020 we were in lockdown in Italy.
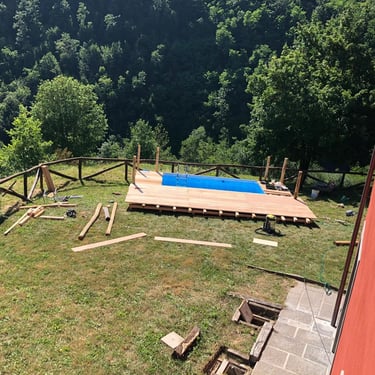
Restrictions were relaxed in May 2020 and we were able to buy a swimming pool and get it delivered; it was literally the only pool available in the whole of Italy. I sourced some chestnut beams and Douglas fir boards and constructed a deck. Building materials were in very short supply by this stage, and I felt lucky to have been able to find enough wood.
The construction of the new house had gone more or less to plan. The work had come in pretty close to budget and was completely pretty much on time. So, by the end of 2019, we had begun to turn our attention to the old house and to figure out what we would be able to do with it.
Our geometra had come up with a great plan for a renovation. It had been costed out and we could just about afford it. However, Covid changed everything and it wound up being vastly more difficult and expensive, and enormously more stressful, than we could ever have imagined.
To see how all this unfolded, follow the rest of the story in"Old house renovation".
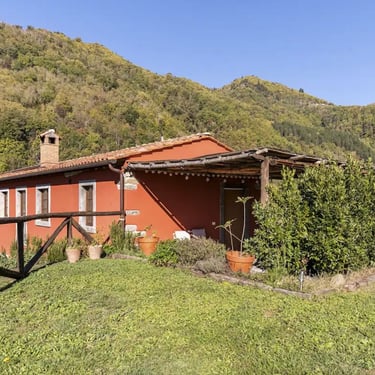
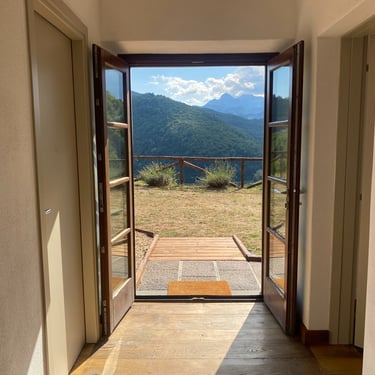
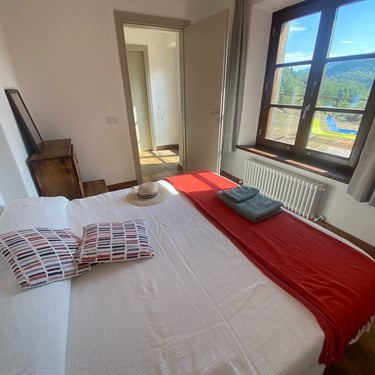
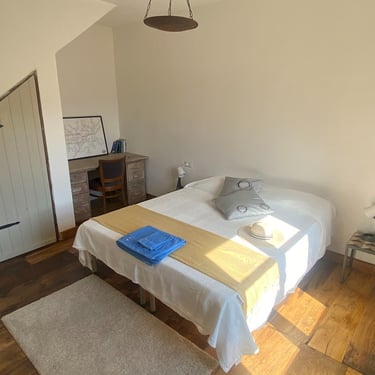
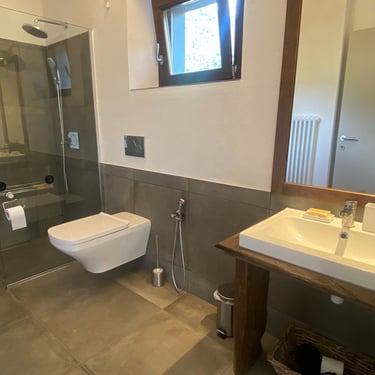
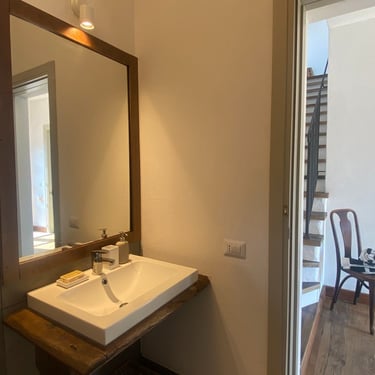
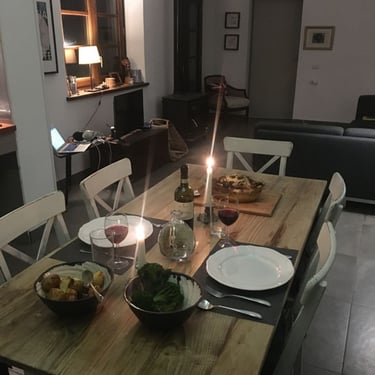
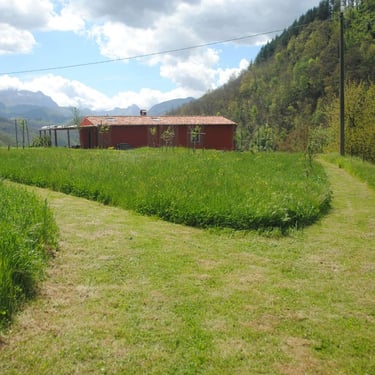
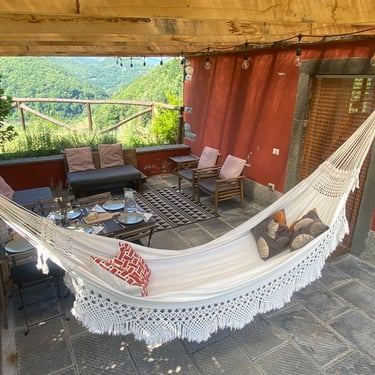
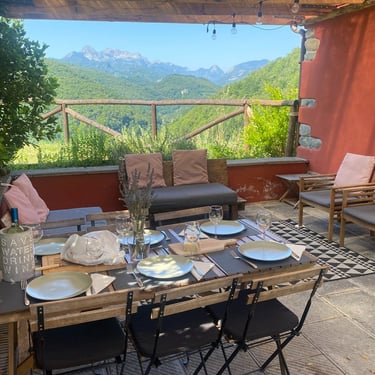
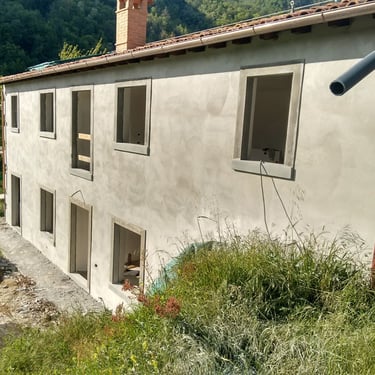
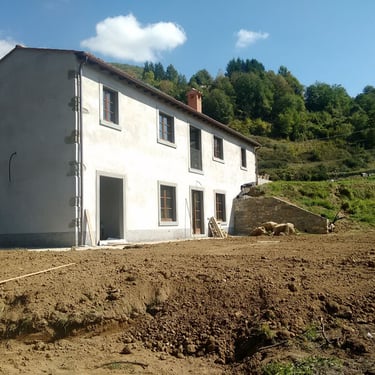
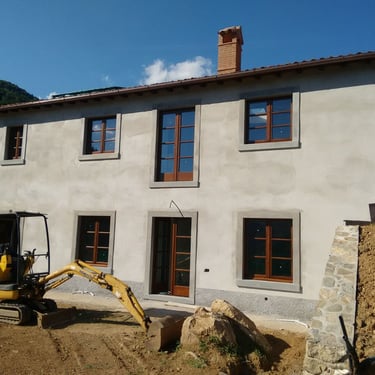
The finished house